When GitHub Actions Sync with OpenShift Pipelines: CI/CD
I build scalable, resilient systems using cloud-native automation—turning code into production-grade infra with Kubernetes, Docker, Terraform, and CI/CD pipelines. Hands-on with real-world labs, I deploy event-driven, observable, and secure workloads on GCP & AWS, optimizing for performance, cost, and developer experience. Driven by clear thinking, continuous learning, and impact-first engineering, I collaborate to ship systems that don’t just work—they evolve.
“Automation is not a luxury — it’s the lifeline of modern DevOps.”
Modern software delivery thrives on automation — not just for speed, but for consistency, scalability, and confidence.
From GitHub Actions (for code testing and validation) to OpenShift Pipelines (for containerized deployment), this post takes you through a full CI/CD journey — from commit to cluster.
🧩 Part 1 — Continuous Integration with GitHub Actions
Before deploying code, we must ensure it’s clean, tested, and reliable.
GitHub Actions provides an elegant way to automate these checks with minimal setup.
Actual Github Repository: https://github.com/barbaria888/ci-cd-final-project
⚙️ Step 1: Set Up Your Workflow
Create a file at .github/workflows/workflow.yml and define your CI pipeline:
name: CI workflow
on:
  push:
    branches: [ "main" ]
  pull_request:
    branches: [ "main" ]

jobs:
  build:
    runs-on: ubuntu-latest
    container: python:3.9-slim

    steps:
      - name: Checkout
        uses: actions/checkout@v3
✅ This ensures the latest version of your repository is fetched on every commit or pull request.
⚙️ Step 2: Install Dependencies
Install your Python dependencies to prepare for linting and testing:
      - name: Install dependencies
        run: |
          python -m pip install --upgrade pip
          pip install -r requirements.txt
💡 Use
pip3if you encounter permission issues.
⚙️ Step 3: Lint the Code with Flake8
Catch style violations, undefined variables, and syntax issues:
      - name: Lint with flake8
        run: |
          flake8 service --count --select=E9,F63,F7,F82 --show-source --statistics
          flake8 service --count --max-complexity=10 --max-line-length=127 --statistics
Clean, consistent code saves hours during review and debugging.
⚙️ Step 4: Test Code Coverage with Nose
Run automated unit tests to ensure nothing breaks:
      - name: Run unit tests with nose
        run: nosetests -v --with-spec --spec-color --with-coverage --cover-package=app
If tests pass — your CI pipeline gives the green light for deployment.
⚙️ Step 5: Commit and Push
git add .
git commit -m "Added CI workflow"
git push origin main
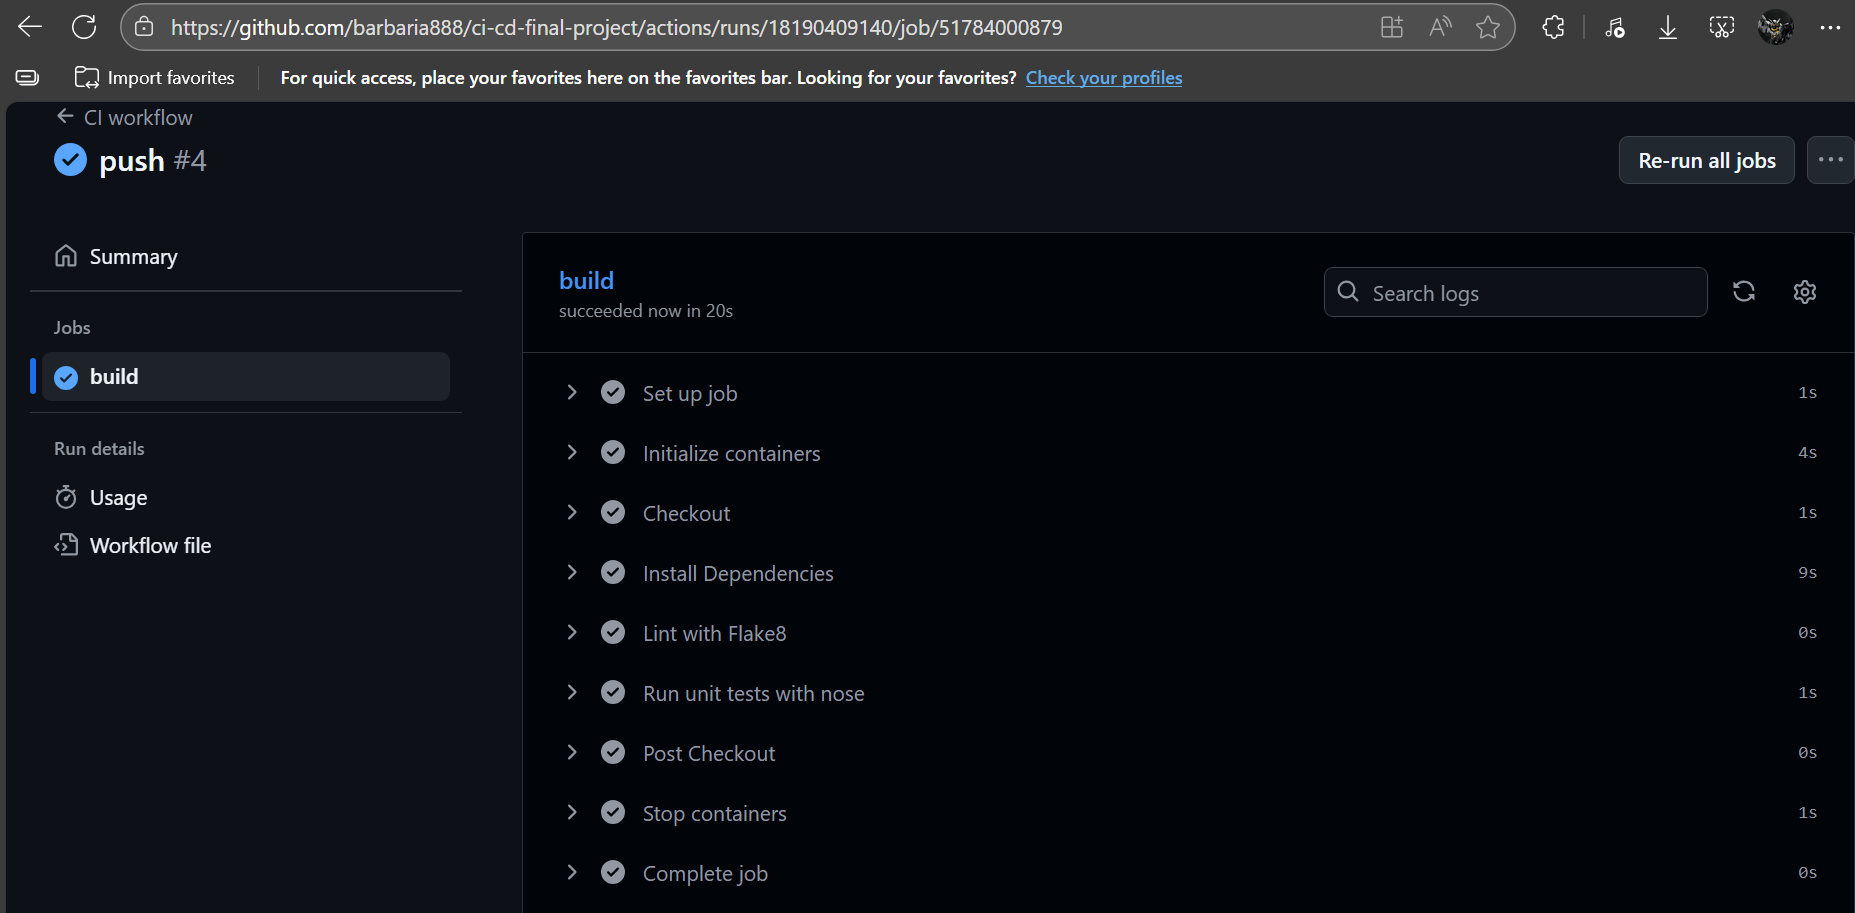
🧠 Why GitHub Actions Matters
This is your Continuous Integration (CI) foundation — ensuring that every code change is validated, linted, and tested before reaching production.
Now, let’s extend this into Continuous Deployment (CD) using OpenShift Pipelines.
🌍 Part 2 — Continuous Deployment with OpenShift Pipelines (Tekton)
Once your code passes all CI checks, it’s time to build, containerize, and deploy automatically.
That’s where OpenShift Pipelines, powered by Tekton, comes in.
🧩 Prerequisites
Ensure Tekton tasks installed and access to an OpenShift cluster.
Create a tasks.yaml file for defining your reusable tasks.
🧹 Task 1: Cleanup Task
apiVersion: tekton.dev/v1beta1
kind: Task
metadata:
  name: cleanup
spec:
  description: Cleans up workspace before a new run.
  workspaces:
    - name: source
  steps:
    - name: remove
      image: alpine:3
      script: |
        #!/usr/bin/env sh
        set -eu
        echo "Cleaning workspace..."
        rm -rf $(workspaces.source.path)/*
🧪 Task 2: Nose Unit Test Task
apiVersion: tekton.dev/v1beta1
kind: Task
metadata:
  name: nose
spec:
  workspaces:
    - name: source
  params:
    - name: args
      default: "-v"
  steps:
    - name: nosetests
      image: python:3.9-slim
      workingDir: $(workspaces.source.path)
      script: |
        #!/bin/bash
        set -e
        python -m pip install --upgrade pip wheel
        pip install -r requirements.txt
        nosetests $(params.args)
Apply the tasks:
kubectl apply -f tasks.yaml
🗄 Step 1: Create a Persistent Volume Claim (PVC)
Create a PVC in OpenShift → Storage → PersistentVolumeClaims
Use:
Name:
oc-lab-pvcSize:
1Gi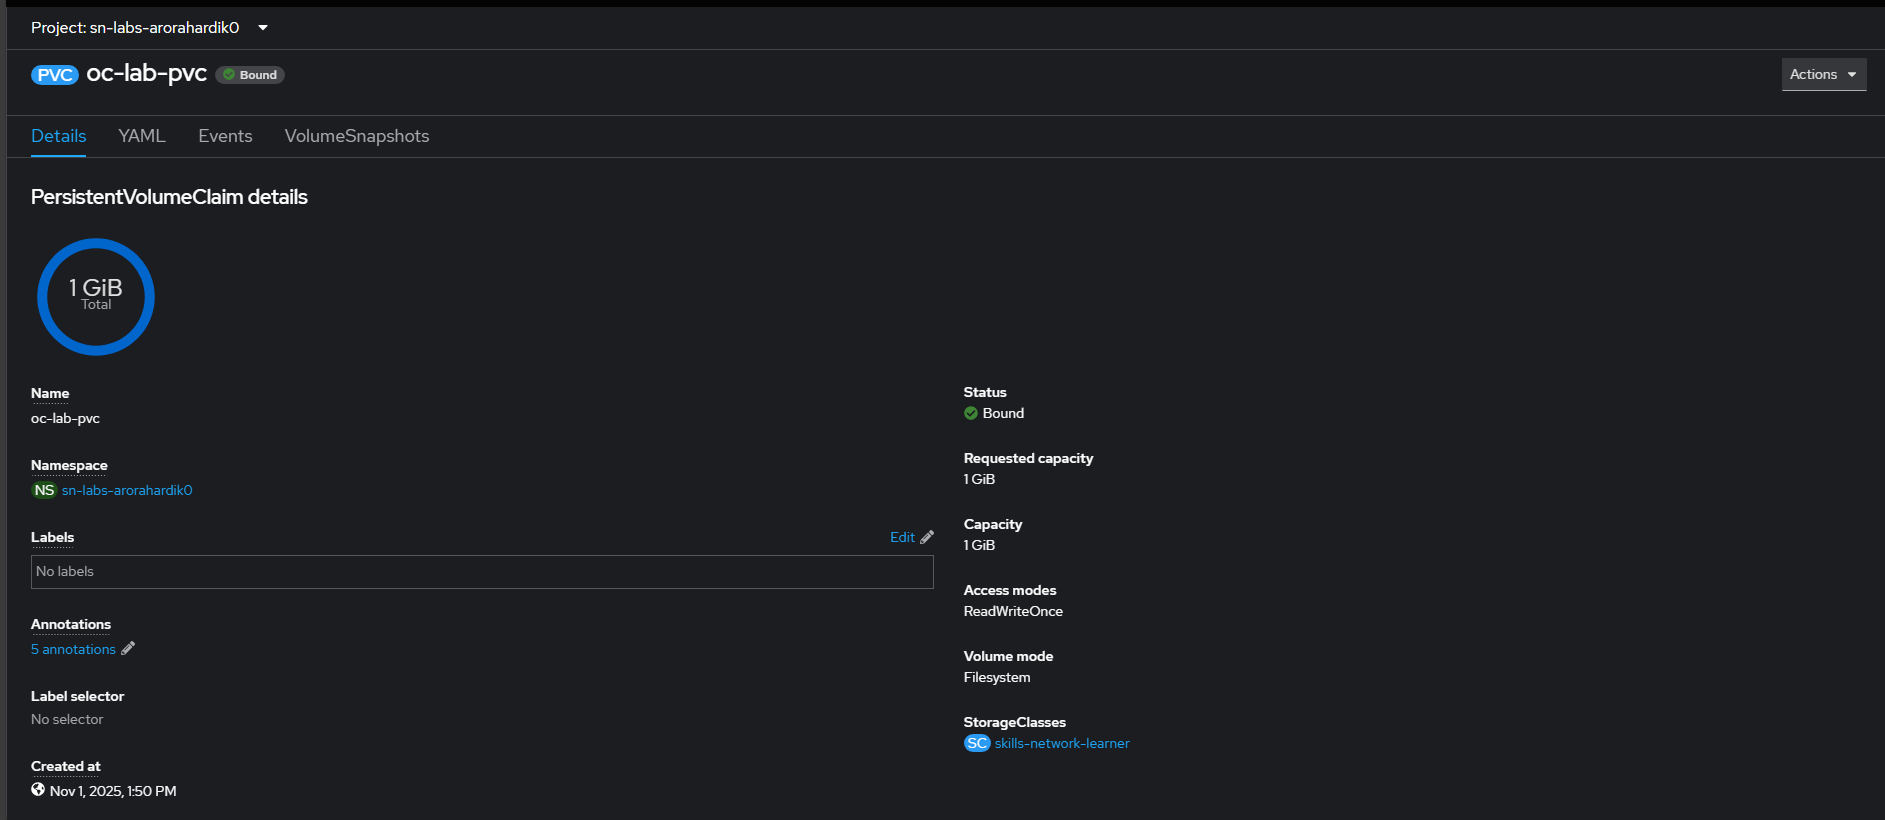
This workspace will persist data between Tekton tasks.
🔧 Step 2: Build Your Pipeline
In Adminstrator Perspective → Pipelines → Create Pipeline
Name it ci-cd-pipeline, add a workspace called output, and use the Pipeline Builder.
🧱 Step 3: Add Tasks Sequentially
Cleanup — wipes the workspace.
git-clone — fetches source code.
flake8 — lints your application.
nose — runs Python unit tests.
buildah — builds your container image.
openshift-client — deploys the app.
Install the task from Tekton Hub if missing:
tkn hub install task git-clone
🧹 Add Linting with Flake8
If Flake8 isn’t installed:
tkn hub install task flake8
Then attach it to the pipeline after git-clone.
🧪 Add Nose Unit Tests
Link the nose task created earlier, using the same workspace output.
🏗 Build with Buildah
After testing, add the buildah task:
This builds and pushes your container image to the registry.
🚀 Deploy with OpenShift Client
Add the final task using the openshift-client:
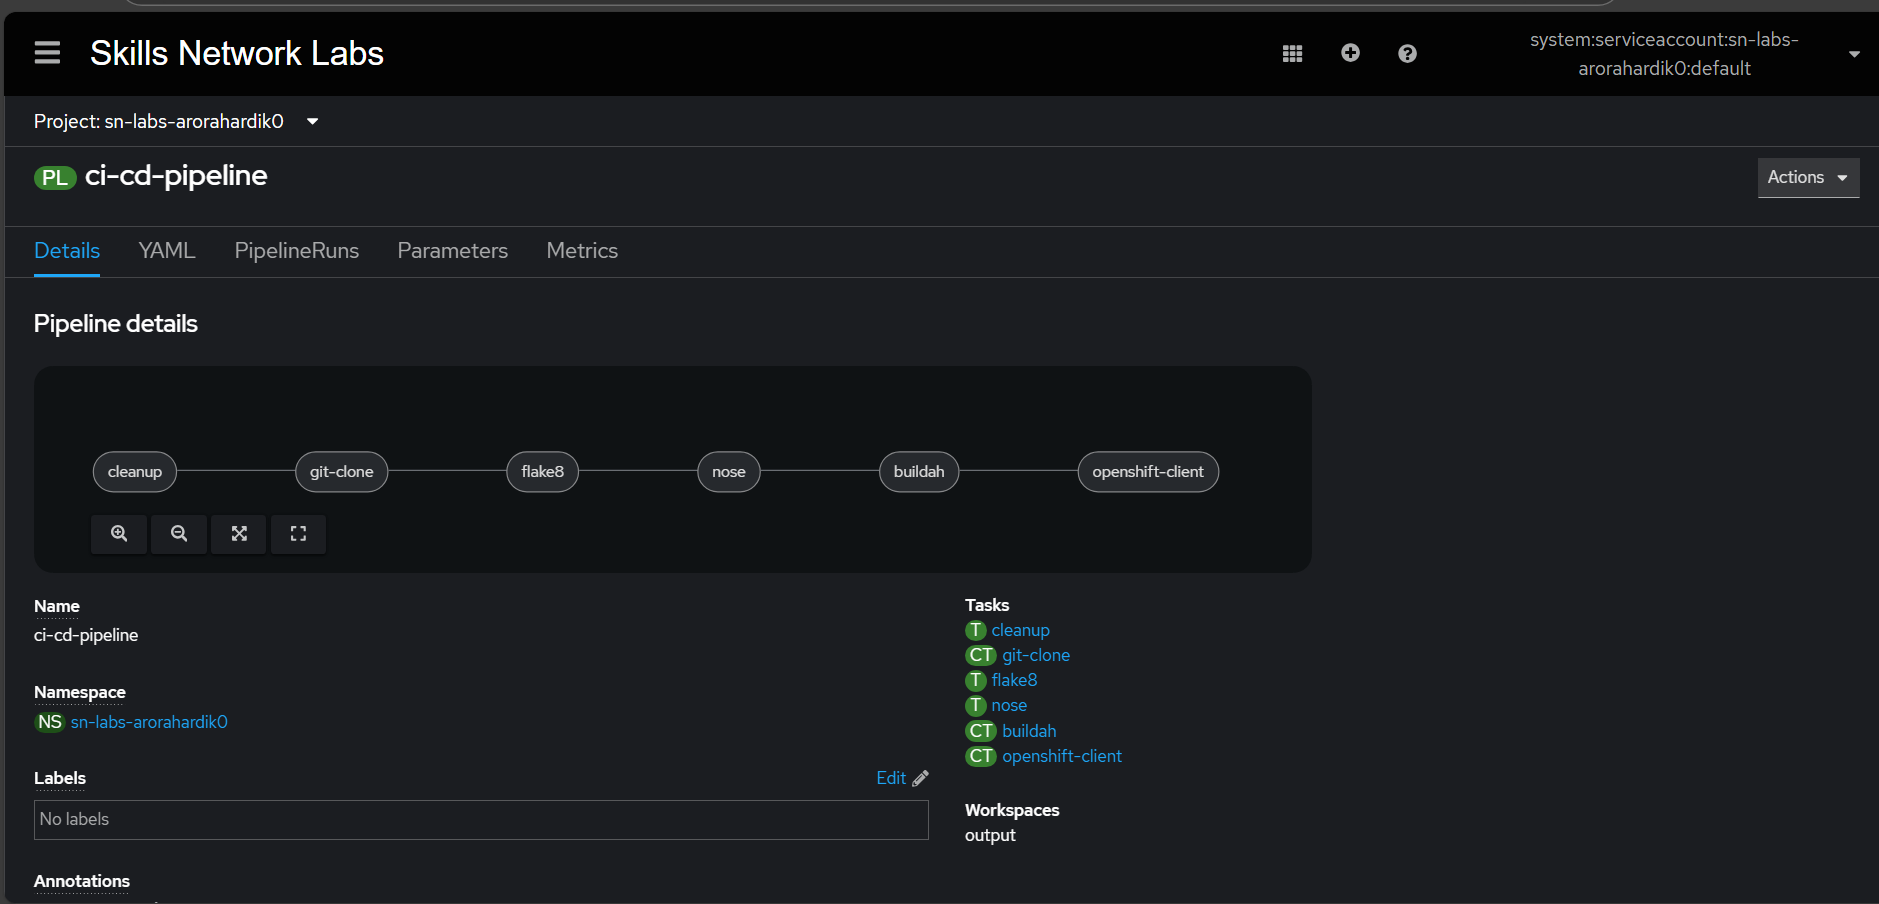
Finally the tasks should look like the image above
✅ Validate the Deployment
Open Topology → Click your Pods→ Logs tab.
You should see:
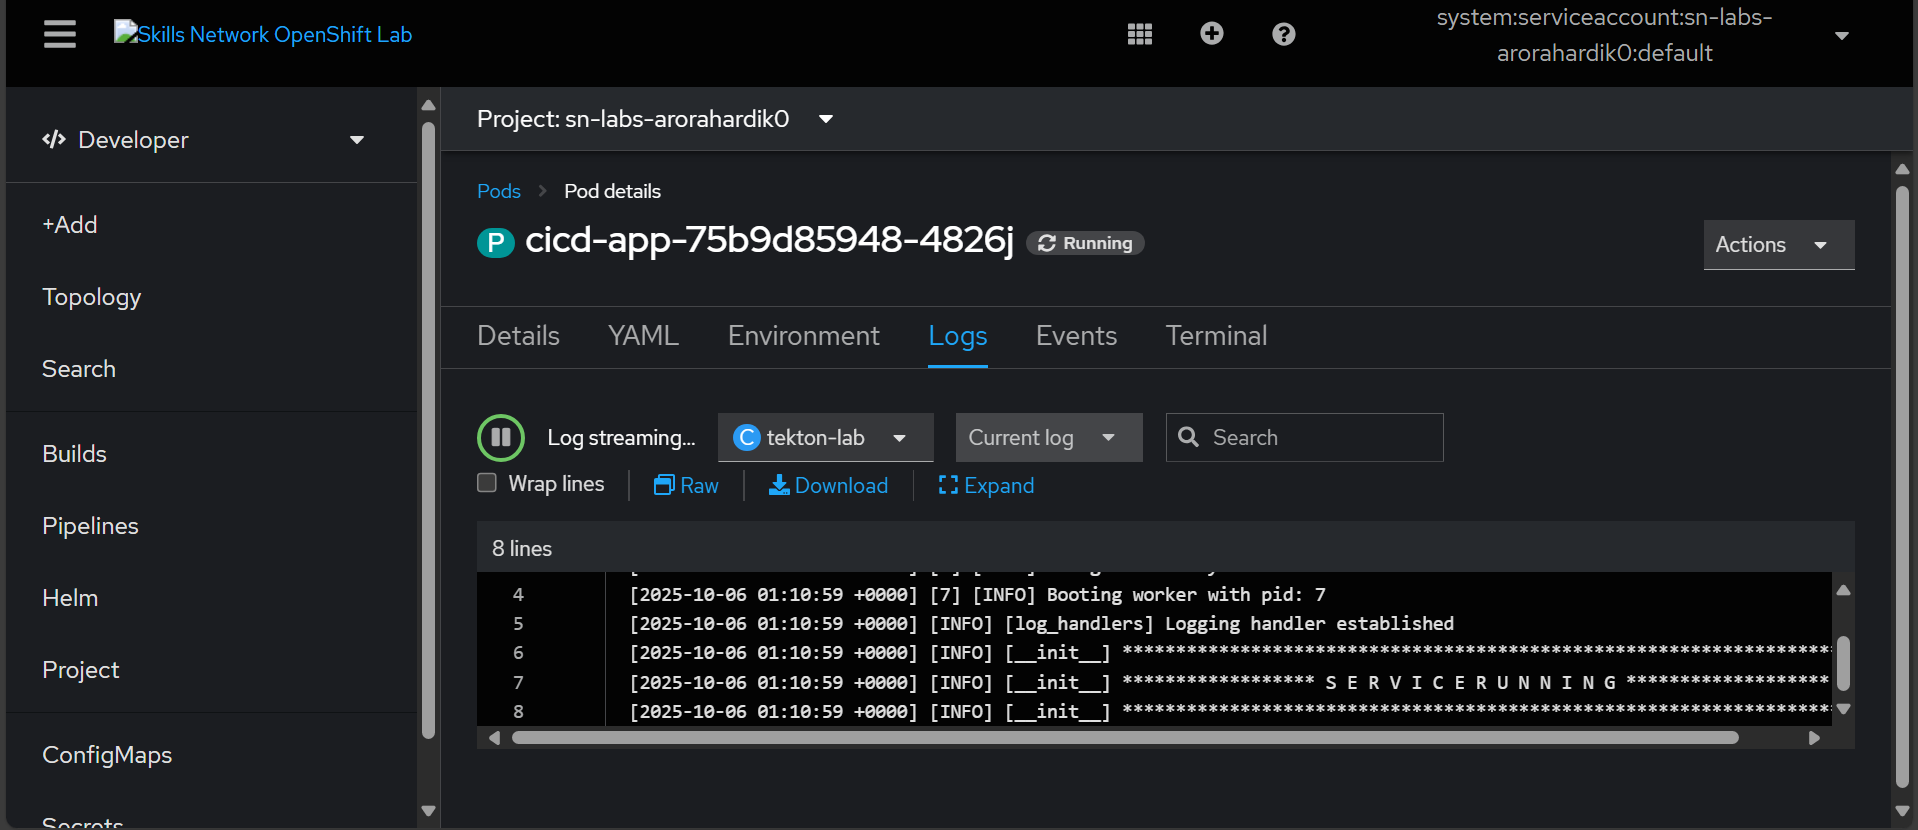
Your CI/CD flow is now live — end-to-end automation achieved.
🎯 Final Thoughts
You just built a complete CI/CD system combining:
| Stage | Tool | Purpose |
| CI | GitHub Actions | Code checkout, linting, and testing |
| CD | OpenShift Pipelines (Tekton) | Build, push, and deploy containers |
This architecture powers everything from startups to global enterprises, providing speed, safety, and scalability across hybrid clouds.
⚙️ GitHub Actions validates your ideas. OpenShift Pipelines turns them into reality.

